Creating Your Own Repository
If you wish to create your own custom repository, follow these steps.
Feel free to deviate and create a repo your own way. Following these steps will provide you with a repo that is able to:
- Automatically build plugins
- Check that plugins are compatible for PRs to the official repo
- Provide you with the ability to easily create PRs by following the next guide
Video Guide:
Instructions:
Fork the GitHub repo
Start by logging into your github account and navigating the browser to this URL:
https://github.com/Unmanic/unmanic-plugins
Select the Fork button in the top right corner.
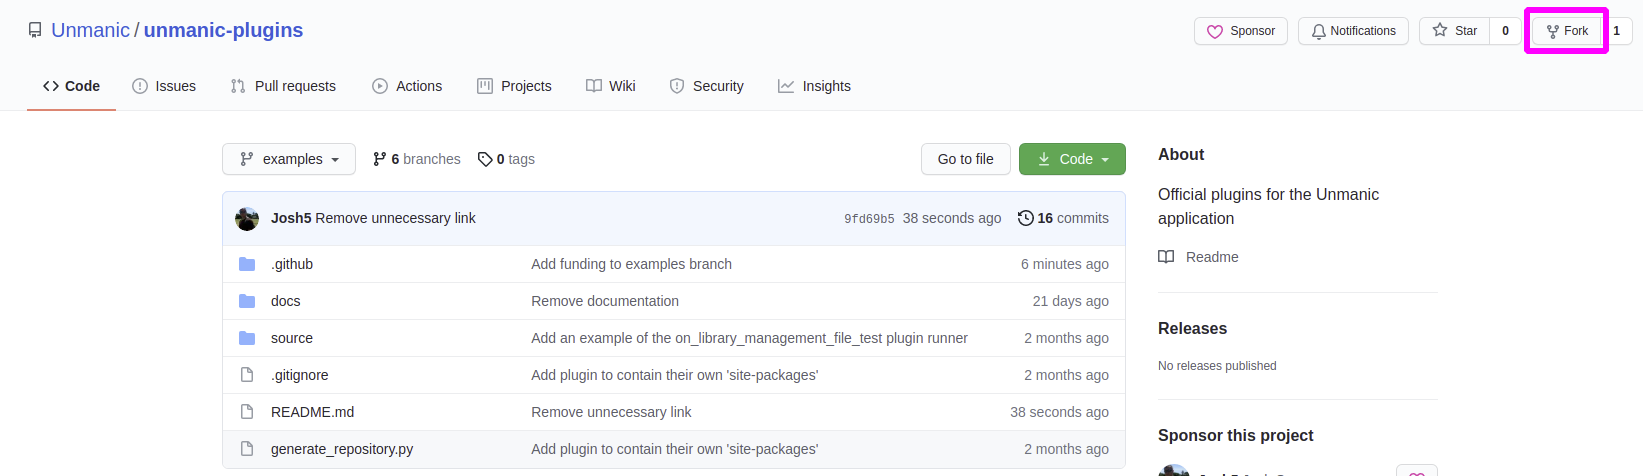
Ensure that the repository is forked into your account.

Configure a GitHub Token
We will rely on GitHub Actions to test, build, commit and push our repo to the "repo" branch of this git repository.
In order for GitHub Action workflow to do this, we need to add a secret variable to our repo that contains a authorisation token for our GitHub account.
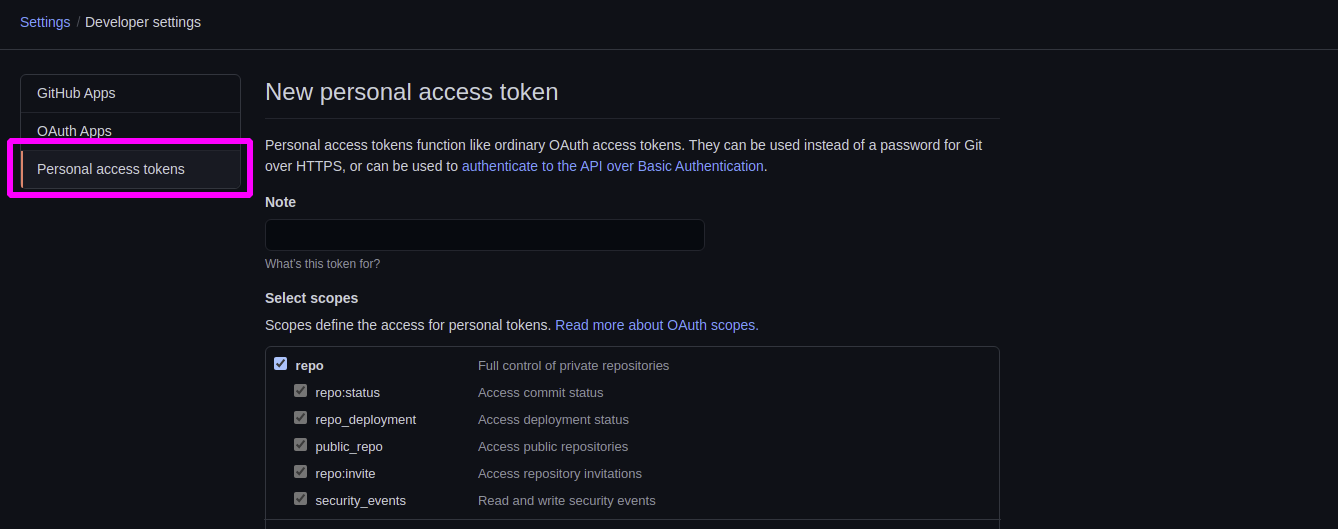
Follow the guide provided here to generate a personal access token. Note down that token as once you have generated it, you cannot see it again.
You will need to create a personal access token authorised for the following things:
- repo (Full control of private repositories)
- repo:status
- repo_deployment
- public_repo
- repo:invite
- security_events
These tokens are sensitive and contain the ability to access/modify your GitHub account. Don't go sharing this information with anyone.
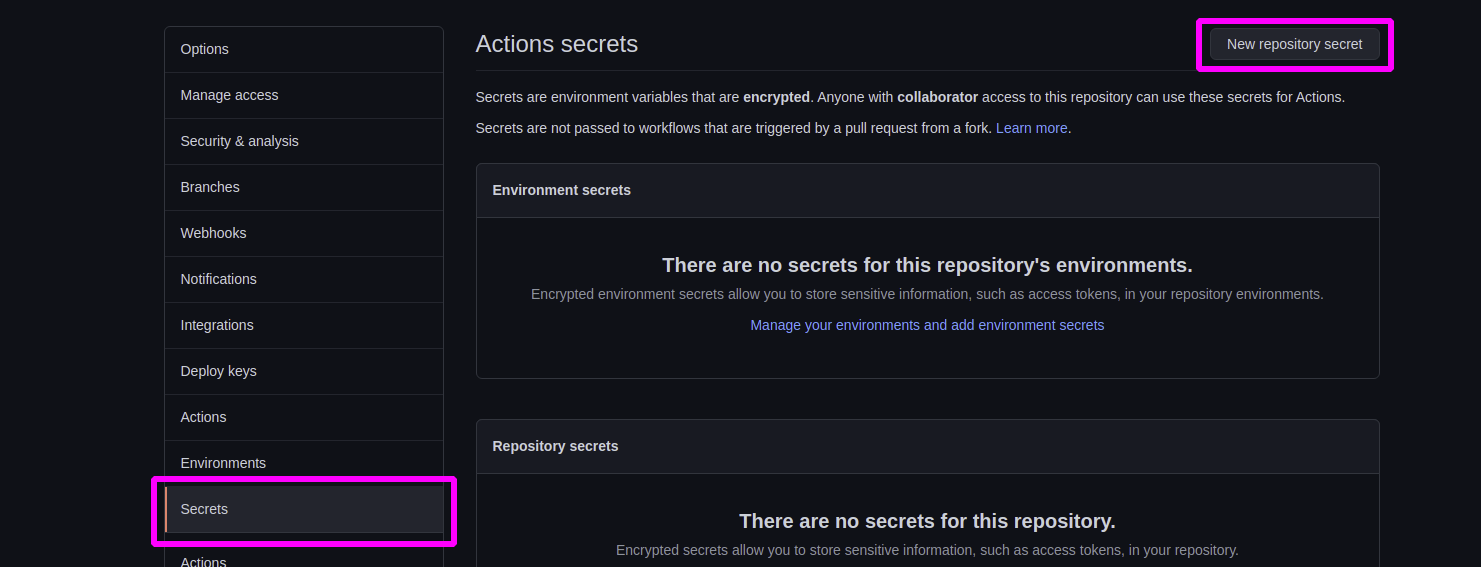
Once you have done that, open the settings tab on your fork repo.

Then select Secrets and then New repository secret
Enter the name as "GH_TOKEN" and then enter the value as the token you created following the steps in the link above.
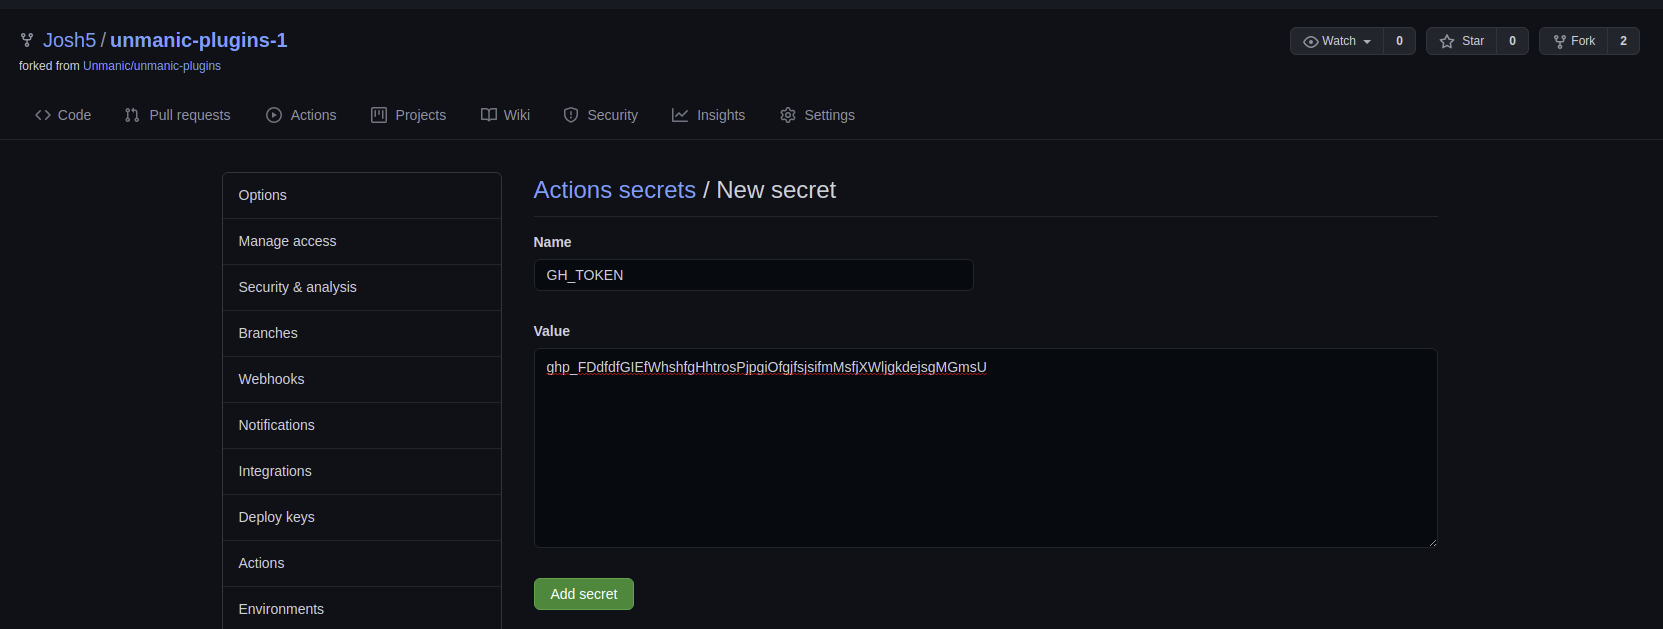
Click the Add secret button.
Clone your fork
Clone the forked repository from your GitHub profile.
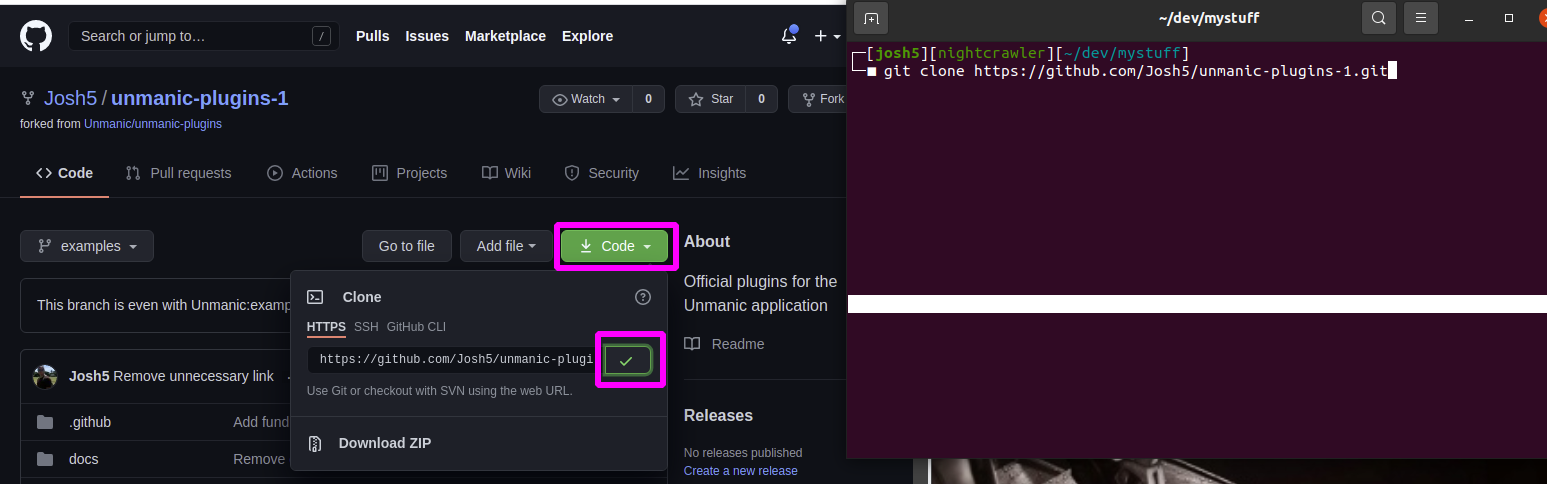
Once you have cloned the repo, change directory to where you cloned it.
cd unmanic-plugins
Checkout the template
Start by checking out the template branch. This branch contains the basic setup required to get started...
git checkout template
Create a new branch called master from the template branch
git checkout -b master
If this is the first time you have cloned this branch it is recommended to push at this point.
Only carry out this step if you have not pushed to master before. This will overwrite anything that already exists in your remote master branch.
git push -f origin master
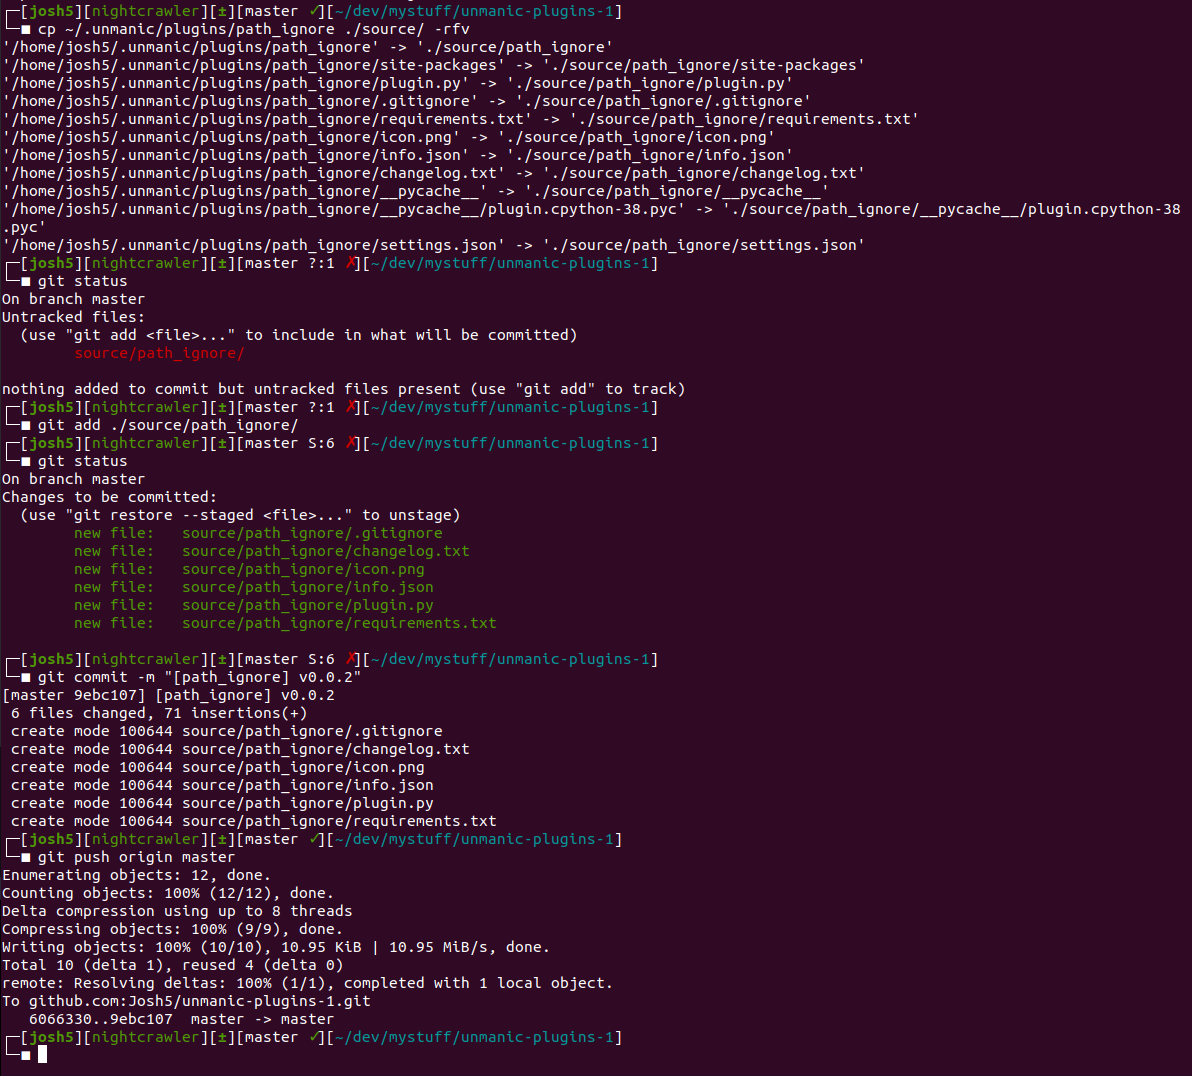
Adding Plugin source to repo
All Plugin source files are added under the source directory.
These should be added under a directory named the same as the Plugin ID.
Add the files to your source directory and commit.
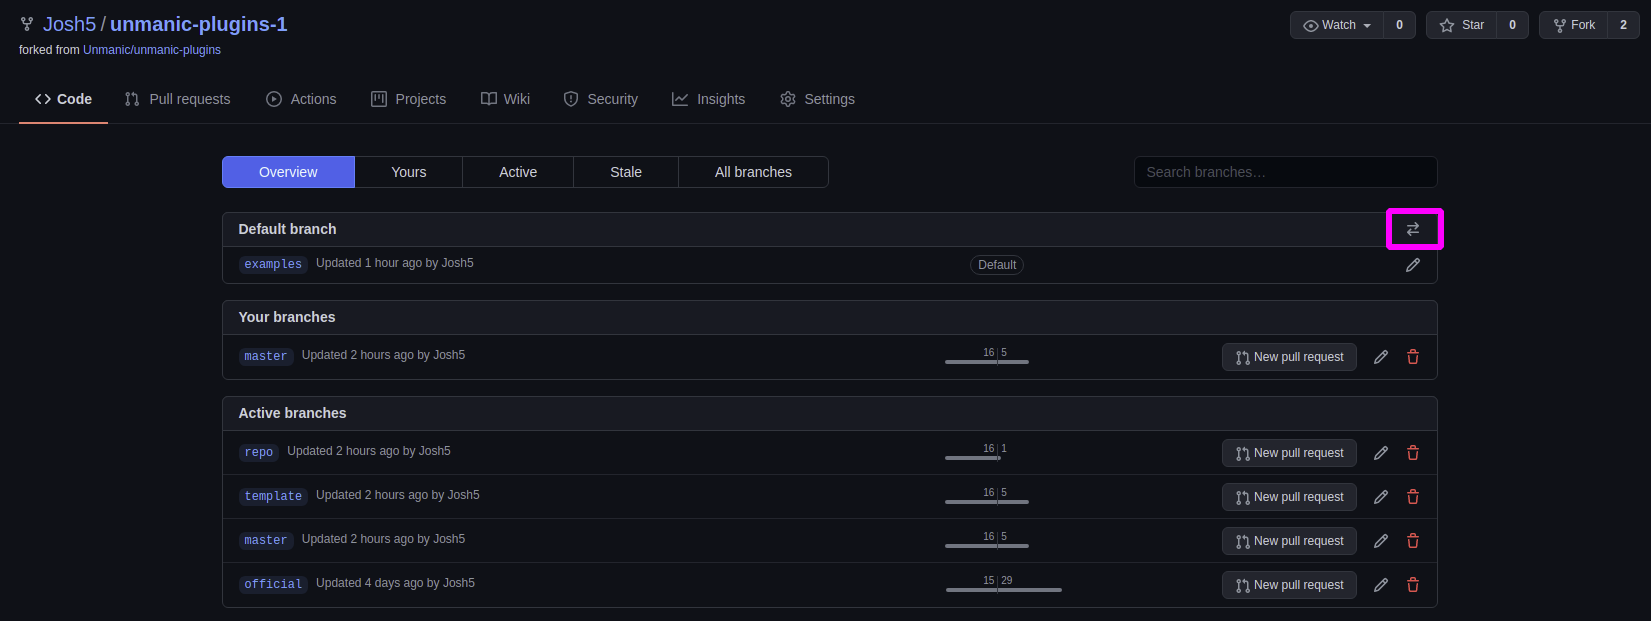
Cleanup branches
You need to set your master branch as the default branch on your GitHub Fork.
To do this, open your GitHub fork in a browser and navigate to the branches screen.

Select the Switch default branch button.
Select the Switch to another branch button. Select the Master branch. Then click Update.
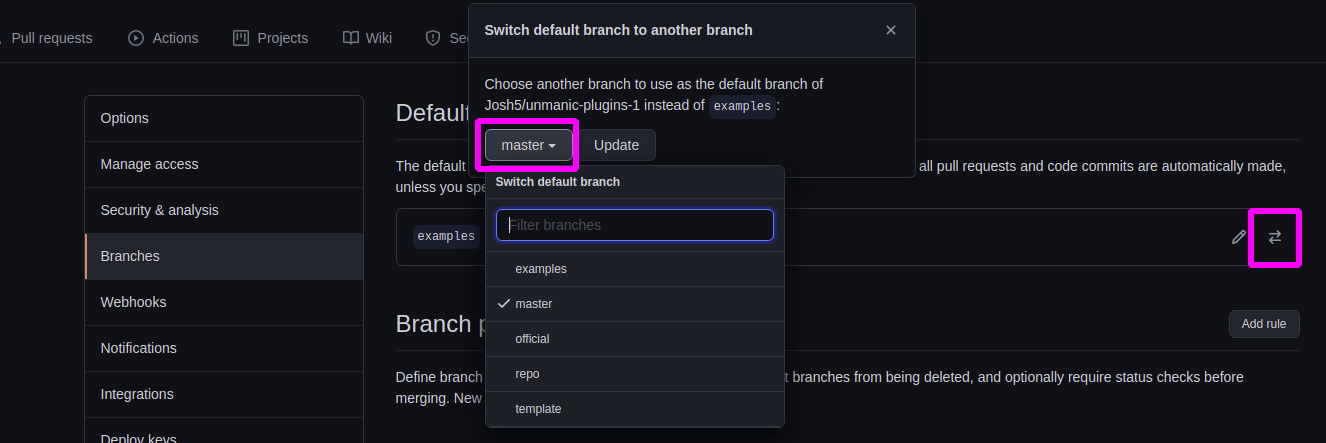
Click the "I understand, update the default branch." button.
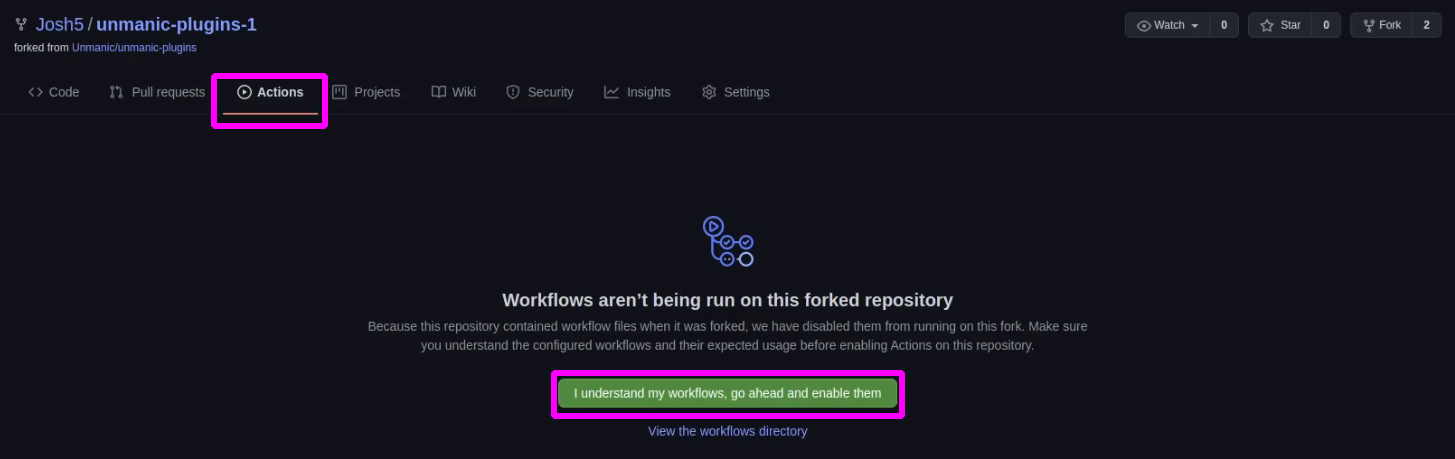
Enable GitHub Actions
GitHub Actions are not enabled by default on new repos. We must first enable it.
The Actions in this repository are managed by the file .github/workflows/plugin-checker.yml.
Without enabling these GitHub Actions, your repository will not build when you push to the master branch.
Now that this is done, whenever you commit something on the master branch and push back to GitHub, it will automatically build your repository into the repo branch, so long as you have configured your GitHub Token above.
Update repo docs
The last step is to update your repository docs so that they reflect your newly created repository.
Two things are required for this...
Update README.md file By default, if you followed these steps, your README.md file will still be pointing to:
https://raw.githubusercontent.com/Unmanic/unmanic-plugins/repo/repo.jsonOpen the
README.mdfile and modify it accordingly.For example, in the above URL, replace "Unmanic/unmanic-plugins" with "JaneDoe/unmanic-plugins".
Create config file You also need to create a
config.jsonfile inside the root directory of your repo on the master branch. In this config.json file, add the following:{
"id": "repository.YOUR_NAME_NO_SPACES",
"name": "THE NAME OF YOUR REPO",
"icon": ""
}
Once you have done this, commit the change and push it to the master branch.
You are now all set to start using your own Unmanic Plugin Repository. You can do this by Adding a Custom Repository in Unmanic's web interface.