Creating Your Own Repository
If you wish to create your own custom repository, follow these steps.
Feel free to deviate and create a repo your own way. Following these steps will provide you with a repo that is able to:
- Automatically build plugins
- Check that plugins are compatible for PRs to the official repo
- Provide you with the ability to easily create PRs by following the next guide
Video Guide:
Instructions:
Fork the GitHub repo
Start by logging into your github account and navigating the browser to this URL:
https://github.com/Unmanic/unmanic-plugins
Select the Fork button in the top right corner.
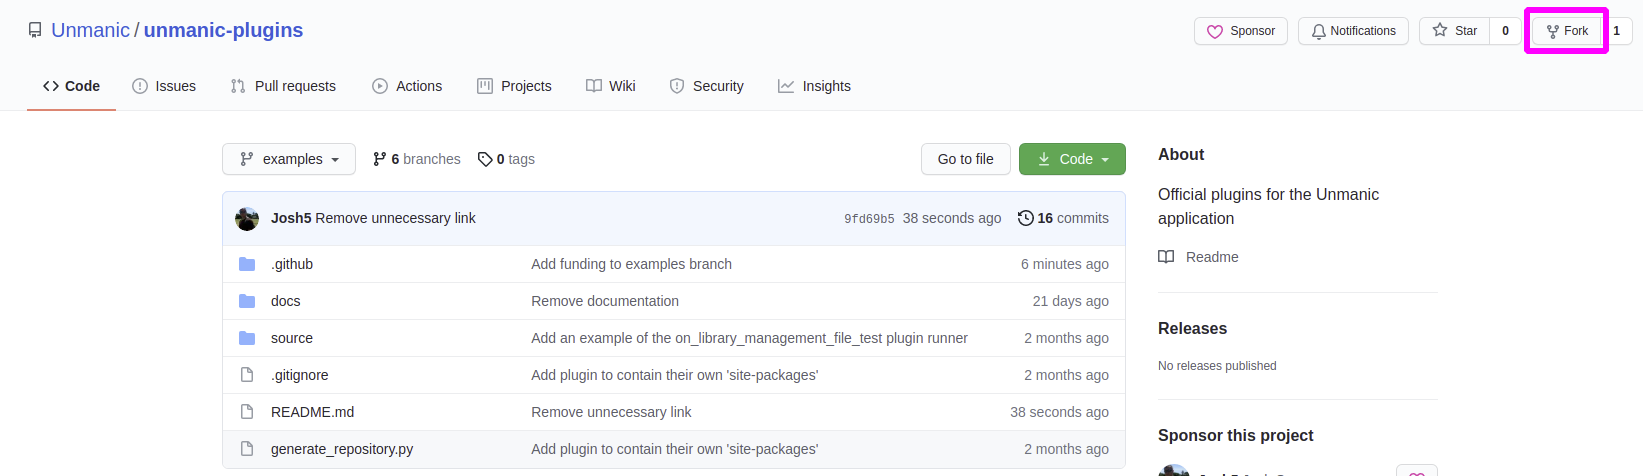
Ensure that the repository is forked into your account.

Cleanup branches
You need to rename the default branch to master or main on your GitHub Fork. If you don't do this, then the GitHub actions will not publish the plugins.
To do this, open your GitHub fork in a browser and navigate to the branches screen.

Select the Rename Branch button.
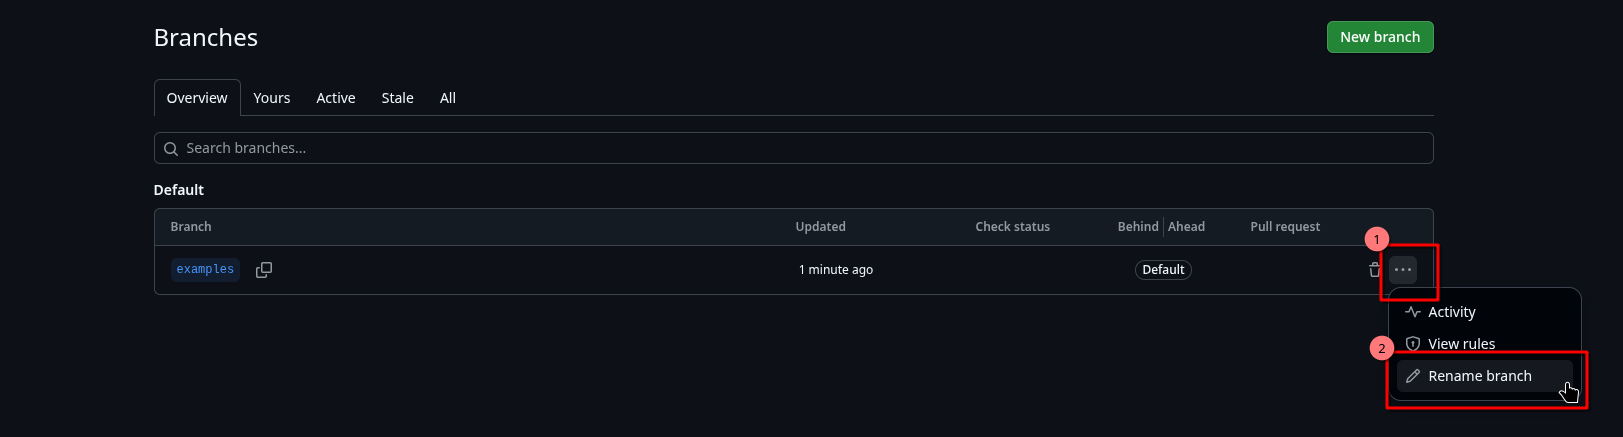
Rename the to either master or main. Select the Master branch. Then click Update.
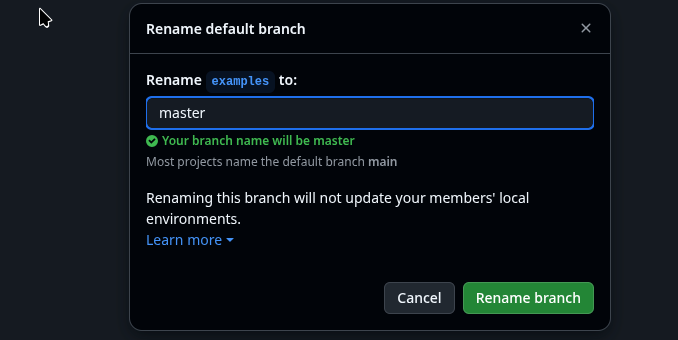
Click the green "Rename Branch." button.
Clone your fork
Clone the forked repository from your GitHub profile.
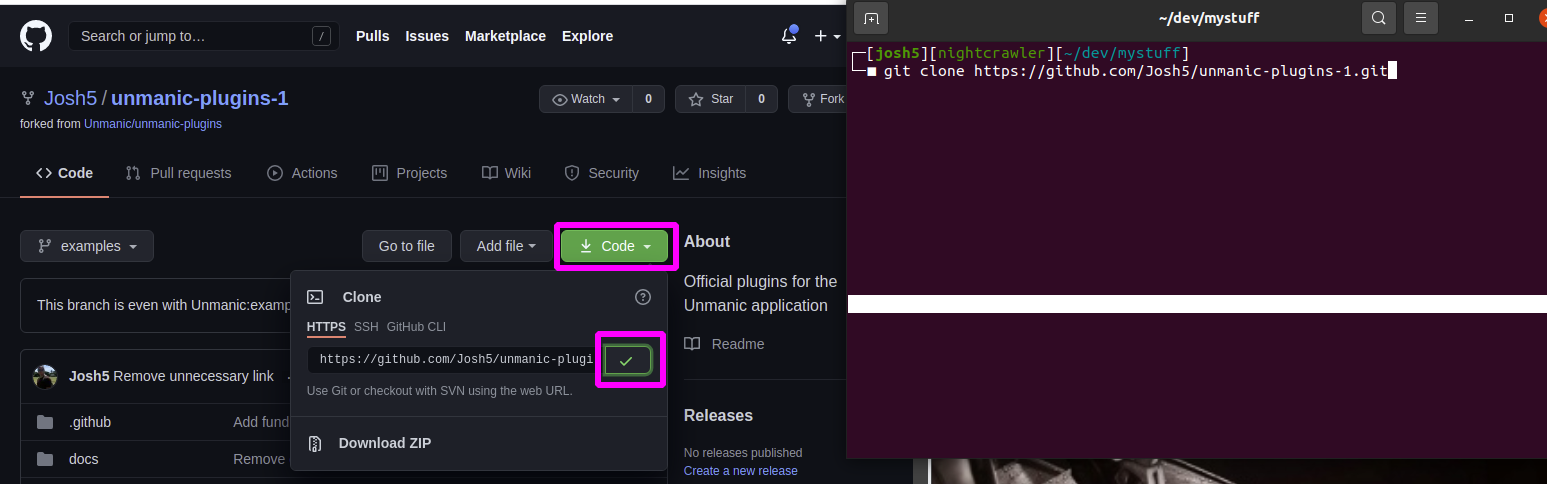
Once you have cloned the repo, change directory to where you cloned it.
cd unmanic-plugins
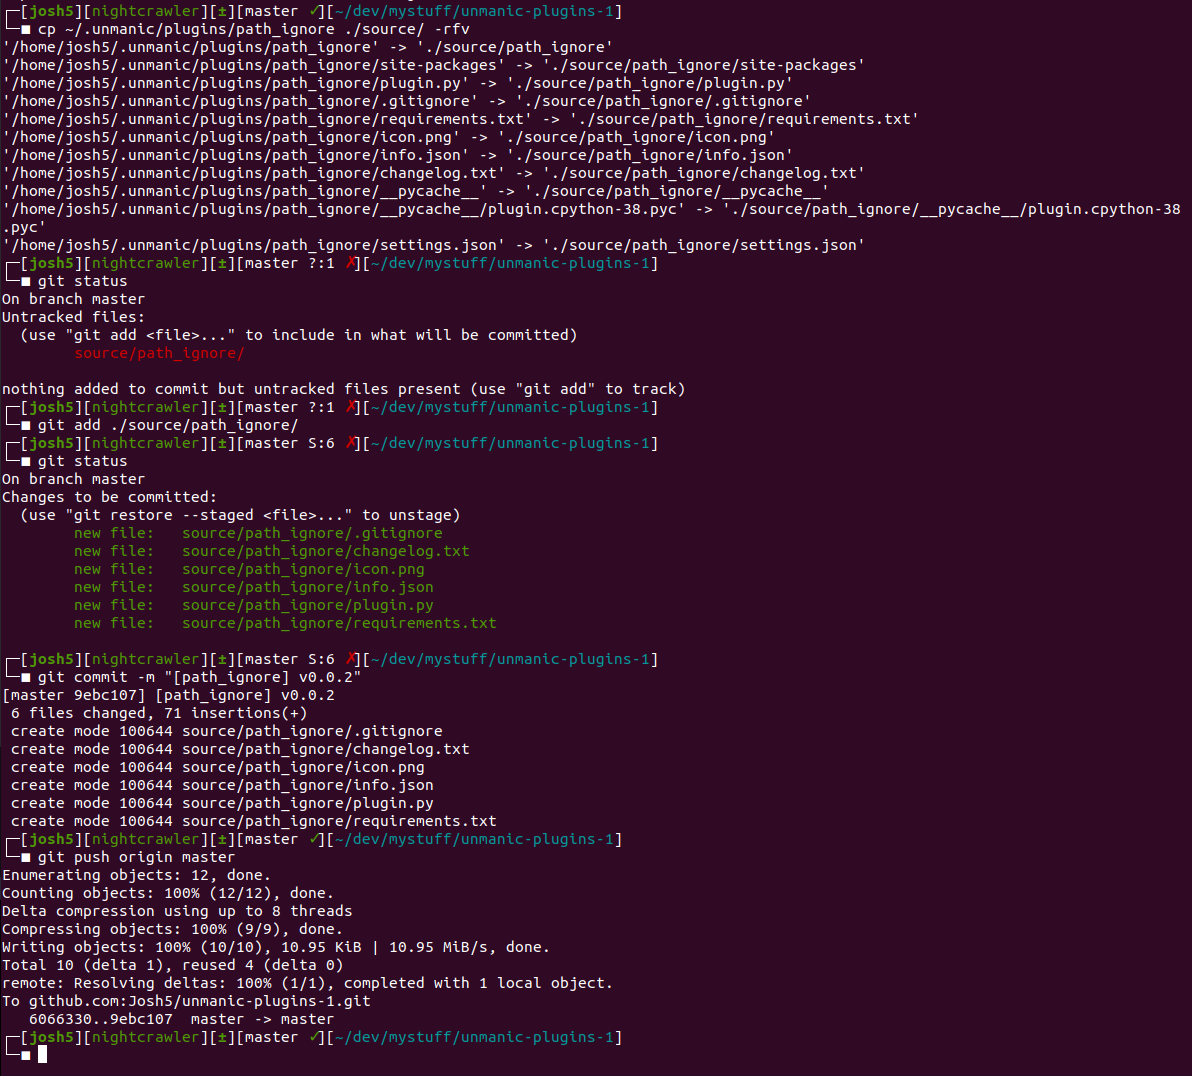
Adding Plugin source to repo
All Plugin source files are added under the source directory.
These should be added under a directory named the same as the Plugin ID.
Add the files to your source directory and commit.
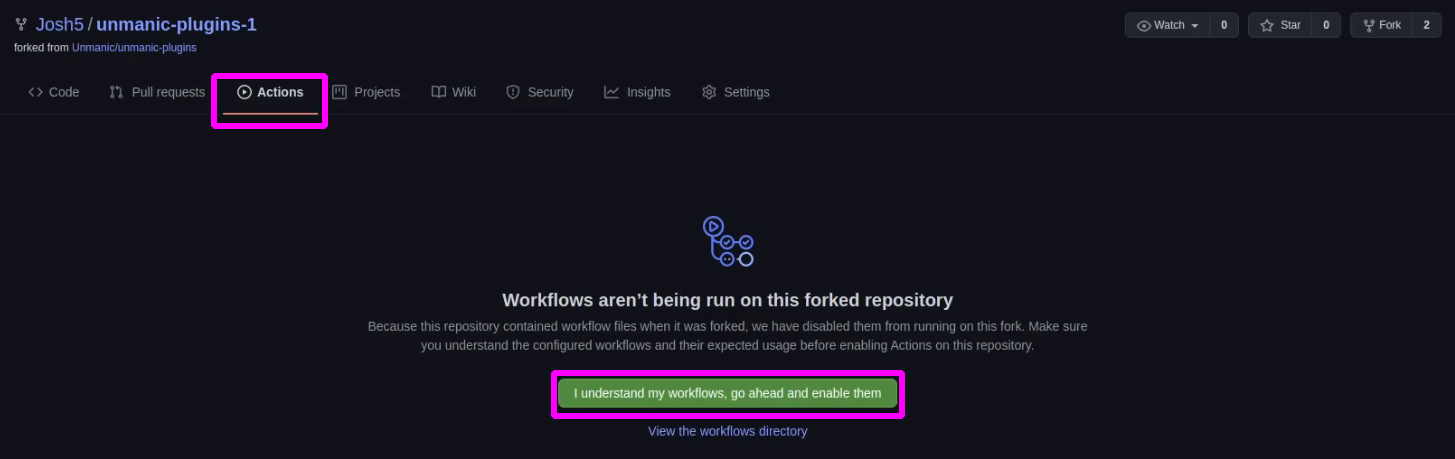
Enable GitHub Actions
GitHub Actions are not enabled by default on new repos. We must first enable it.
The Actions in this repository are managed by the file .github/workflows/plugin-checker.yml.
Without enabling these GitHub Actions, your repository will not build when you push to the master branch.
Now that this is done, whenever you commit something on the master branch and push back to GitHub, it will automatically build your repository into the repo branch.
Update repo docs
The last step is to update your repository docs so that they reflect your newly created repository.
Two things are required for this...
-
Update README.md file By default, if you followed these steps, your README.md file will still be pointing to:
https://raw.githubusercontent.com/Unmanic/unmanic-plugins/repo/repo.jsonOpen the
README.mdfile and modify it accordingly.For example, in the above URL, replace "Unmanic/unmanic-plugins" with "JaneDoe/unmanic-plugins".
-
Create config file You also need to create a
config.jsonfile inside the root directory of your repo on the master branch. In this config.json file, add the following:{
"id": "repository.YOUR_NAME_NO_SPACES",
"name": "THE NAME OF YOUR REPO",
"icon": ""
}
Once you have done this, commit the change and push it to the master branch.
You are now all set to start using your own Unmanic Plugin Repository. You can do this by Adding a Custom Repository in Unmanic's web interface.