Installation on Unraid
Video Guide:
Instructions:
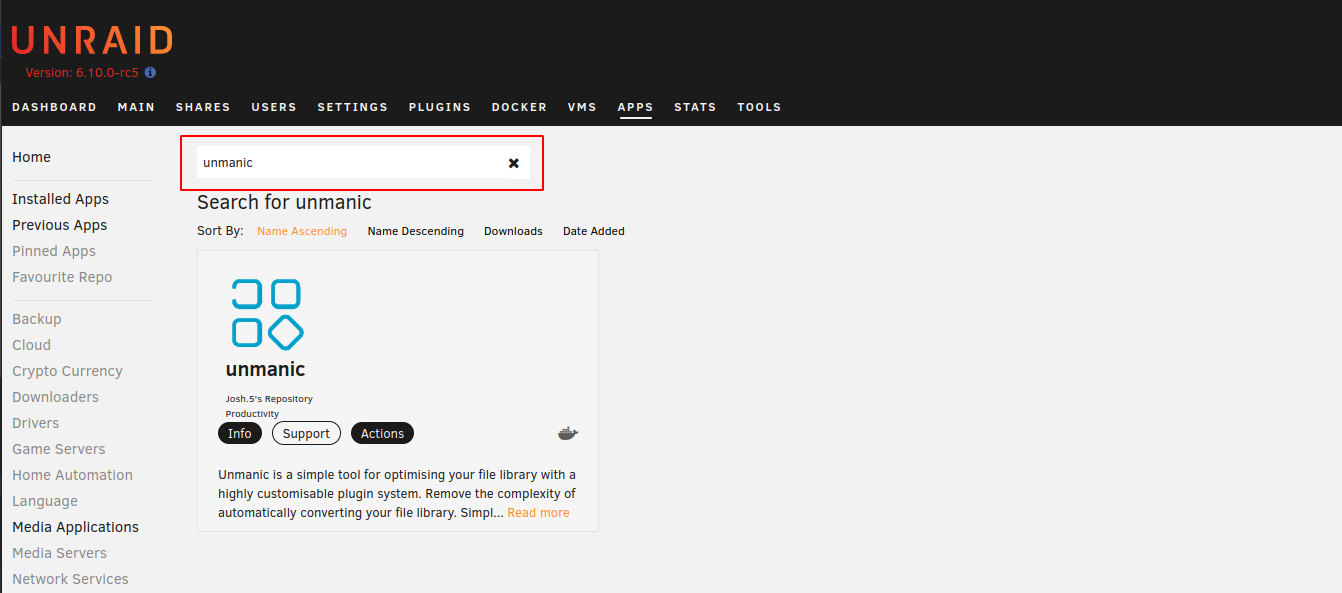
- Navigate to the Apps tab and search for "Unmanic" in the search box.
- Click on the "Install" button
- Modify the container variables as desired:
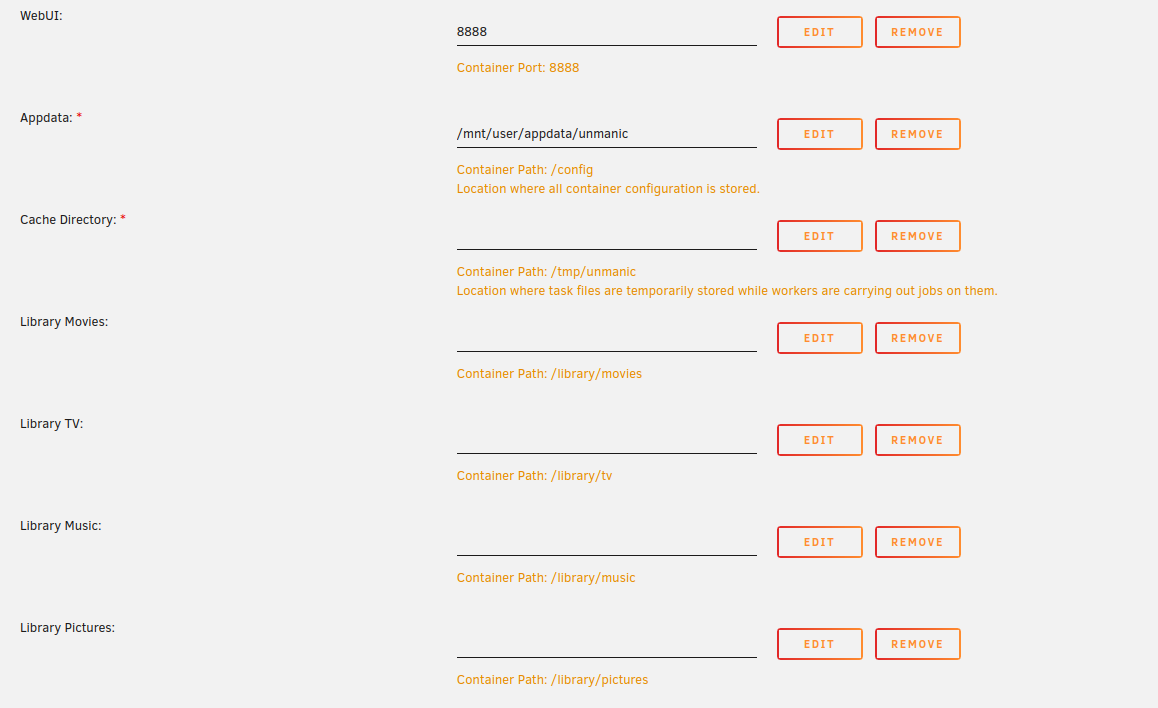
Here are a few common variables to consider:
- Cache Directory: This is the temporary workspace where Unmanic copies files while processing. Each worker can create up to two full-size copies (input + output), so size accordingly. For example, if you process ~10 GB files with 3 workers, you should plan for up to ~60 GB of cache (10 GB x 2 x 3). If the cache directory runs out of space, jobs will fail. Use a fast disk or a dedicated share with enough headroom for your worker count and typical file sizes.
- Library mounts: Add as many library mounts as you need, remove the defaults, or create new ones. Unmanic libraries can point at any container path you define, so choose the layout that matches your shares. Ensure the paths are readable and writable by the container user (PUID/PGID) or Unmanic will not be able to scan or write output files.
Configuring RAM as the Cache Directory.
There are two main options:
1) Use /dev/shm/
The simplest way to set the Cache Directory to a ramdisk is to set this path as /dev/shm/unmanic.
This path is a tmpfs mount, however it is limited to 50% of your total system memory by default.
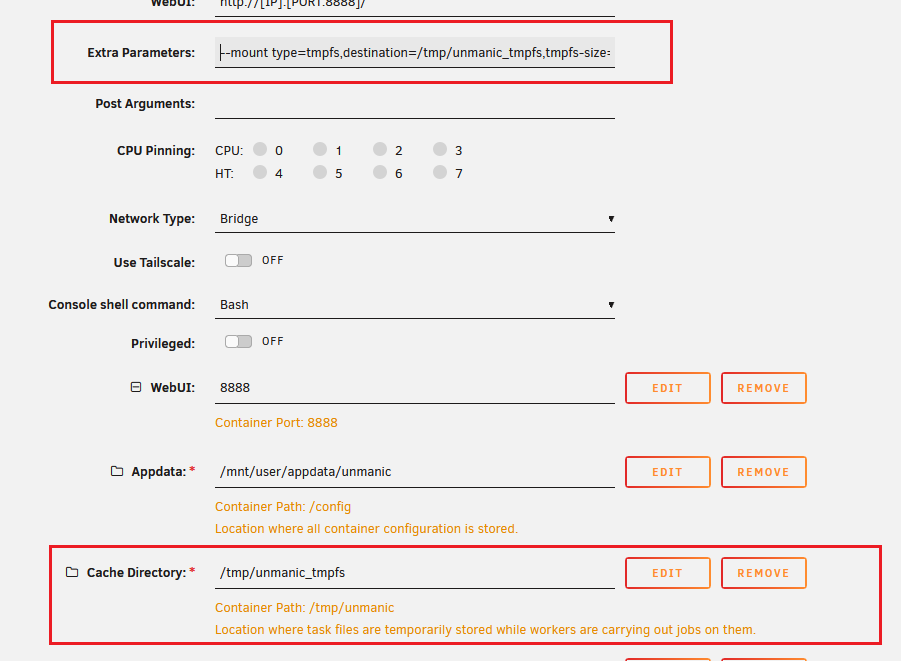
2) Create a custom tmpfs mount
If you wish to use more than 50% of your memory, set your Cache Directory to /tmp/unmanic_tmpfs
Then, add the following snippet to your Extra Parameters and change 20g to the upper limit of whatever amount of RAM you wish to use:
--mount type=tmpfs,destination=/tmp/unmanic_tmpfs,tmpfs-size=20g,tmpfs-mode=1777
This does not reserve this amount of RAM for the container. It only creates a mount limited to the amount specified. You will still be limited to the amount of RAM available on the system as shared by all other processes.
Whatever option above that you choose, you will need ensure you have enough available memory for the container to use this location as the cache.
- Scroll to the bottom and click the "APPLY" button
Once the image is downloaded you should see it appear in the Docker tab.
Some optional configuration steps:
Nvidia GPU hardware encoding:
To use your NVIDIA GPU for hardware encoding in this container, follow these steps:
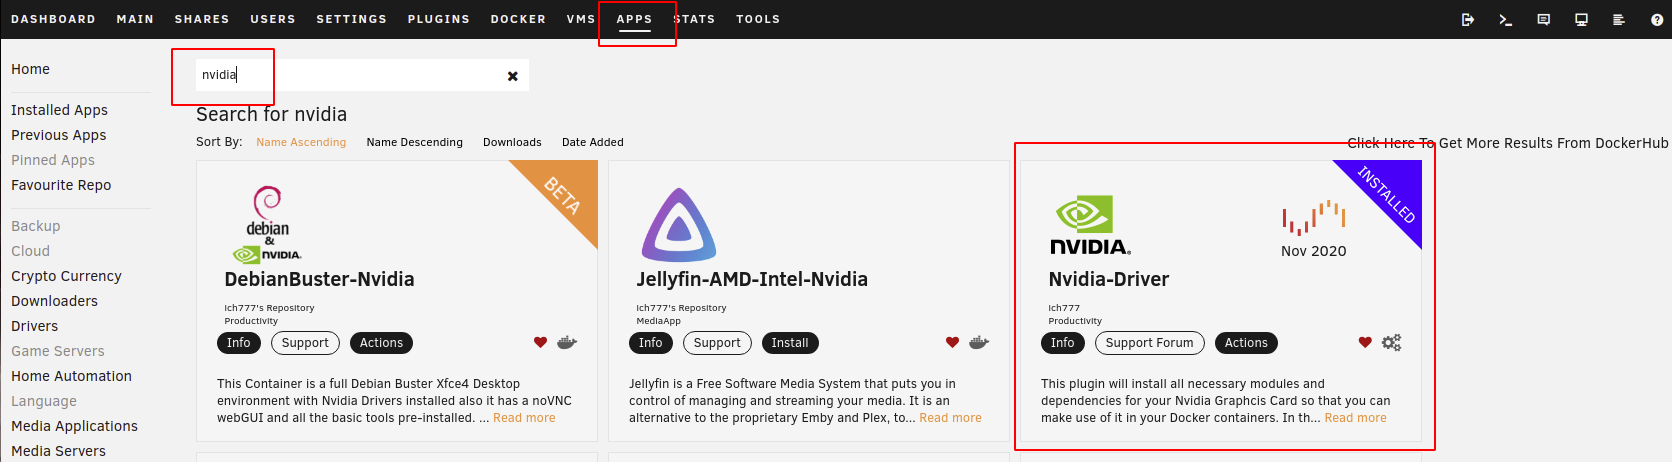
- Install the Unraid Nvidia-Driver Plugin from the Apps tab.
- Go to the Settings tab, then under User Utilities open the Nvidia Driver plugin.
- Select the driver for your card, install it, and reboot the server.
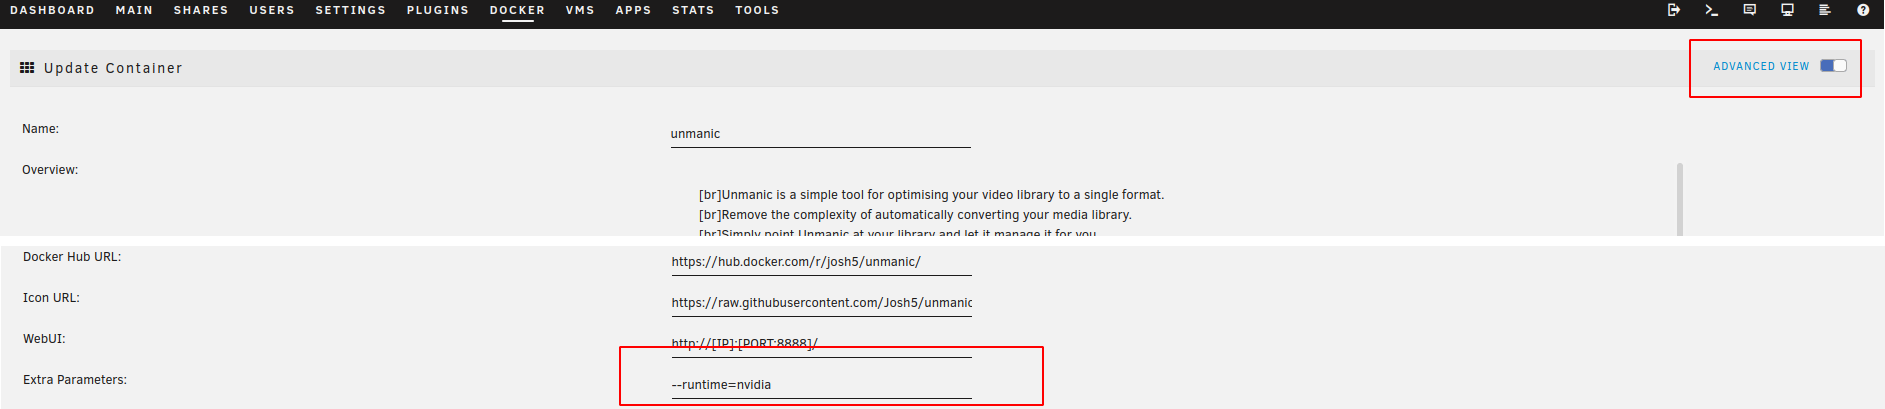
- Go to the Docker tab, click Unmanic, and select Edit to open the container template.
- Toggle this Docker Container template editor to "Advanced View".
- In the "Extra Parameters" field, add
--runtime=nvidia.
- Expand the template "Show more settings..." section near the bottom.
- In the "NVIDIA_VISIBLE_DEVICES" variable, copy your GPU UUID (can be found in the Unraid Nvidia Plugin. See that forum thread for details)

Once you have completed these steps, you should be able to use the h264_nvenc and hvec_nvenc encoders or use the AI upscaling plugin.
Intel hardware encoding:
To use your INTEL Processor for hardware encoding in this container, follow these steps:
- Install the Intel-GPU-TOP Plugin.

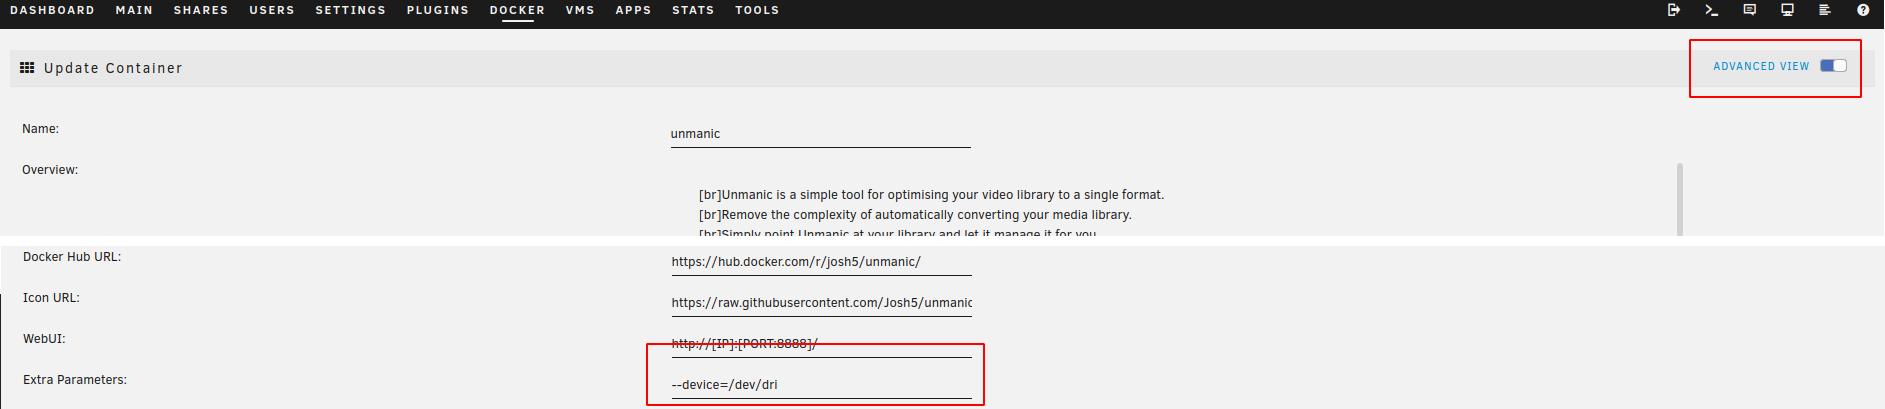
- Toggle this Docker Container template editor to "Advanced View".
- In the "Extra Parameters" field, add
--device=/dev/dri.
Once you have completed these steps, you should be able to use the h264_vaapi and hevc_vaapi encoders.
AMD hardware encoding:
To use your AMD APU/GPU for hardware encoding in this container, follow these steps:
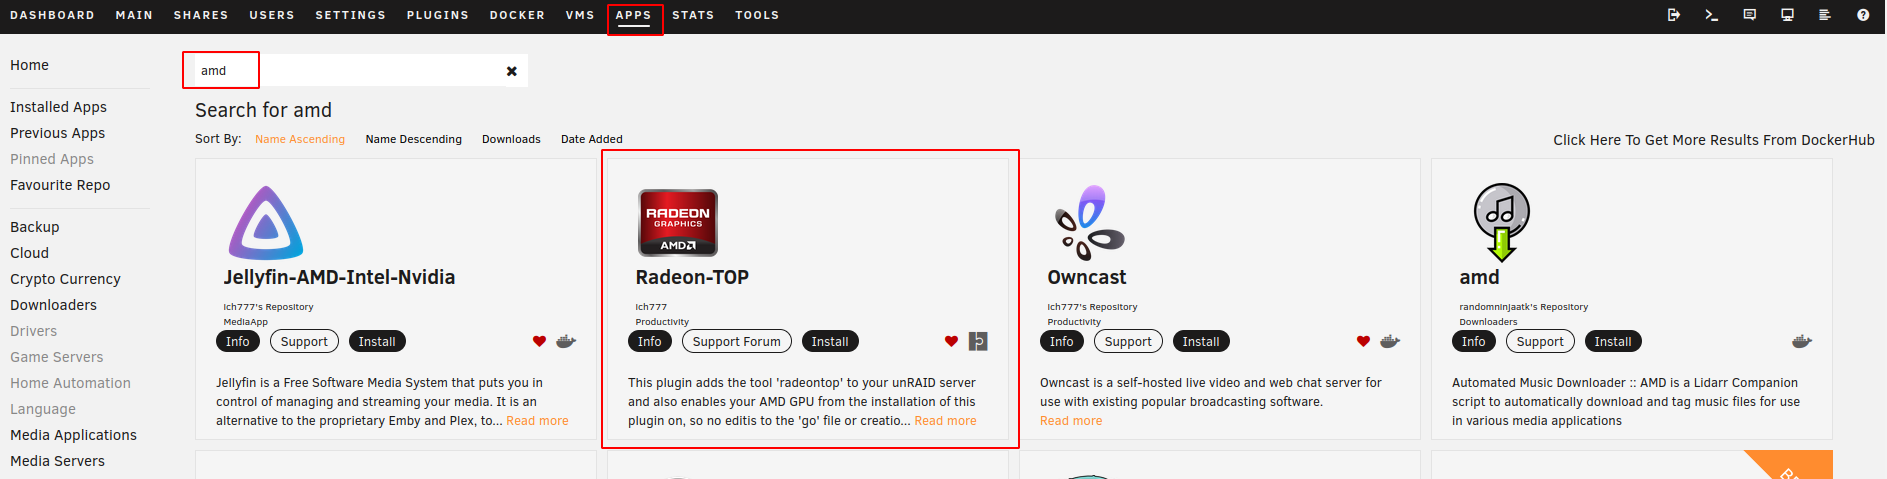
- Install the Radeon-TOP Plugin.
- Toggle this Docker Container template editor to "Advanced View".
- In the "Extra Parameters" field, add
--device=/dev/dri.
Once you have completed these steps, you should be able to use the h264_vaapi and hevc_vaapi encoders.
Ryzen APU transcode performance is heavily determined by the speed of your RAM.
Setting RAM speed from 2400 to 3200 changed transcode times from around 10 minutes to around 5.
Also, if you have the option in your BIOS, set your iGPU RAM to at least 1GB (So long as you can afford to subtract that from your available RAM).