Configuring Libraries
To modify the settings of one of your libraries, click the ![]() button.
button.

This will open up a new dialog.
Library Configuration
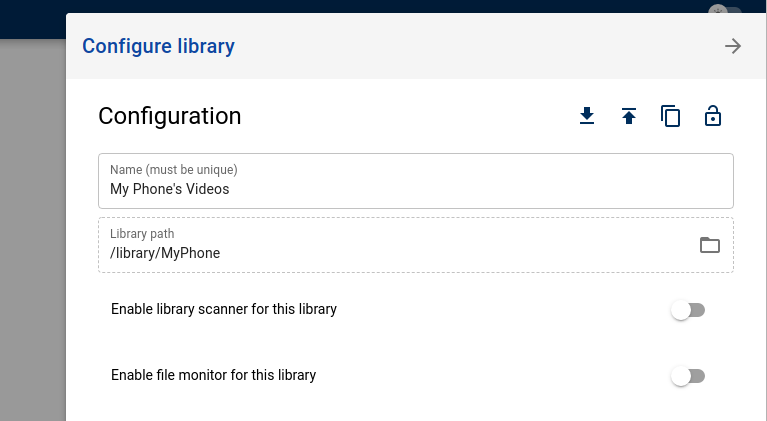
This dialog allows you to configure how the library should behave. Here you can modify the library's name and path.
Use this library only for linked remote tasks
Enable this on libraries that should accept tasks from a linked installation but should not discover files on their own.
When enabled:
- The library scanner will not scan this library.
- The file monitor will not watch this library path.
- The library is treated as a remote-target library in the UI.
When disabled:
- The library can be scanned and monitored normally, depending on the other library settings.
Important notes:
- This option does not prevent pending tasks from being created against the library.
- This option does not force linked tasks to be uploaded over HTTP.
- If a linked installation sends a task for a file and the remote host can resolve that file under this library's configured path, Unmanic will still create the remote pending task by path and process it directly from shared storage.
- If the remote host cannot resolve the file path, Unmanic falls back to the upload/download transfer flow.
This setting is mainly useful for linked installations where the remote host should act as a worker target for tasks sent from another Unmanic instance, rather than scanning the library independently.
Enable library scanner for this library
When this is selected, the library scanner will also include the path given by this library.
If you leave this option unselected, the library scanner will ignore this library when carrying out automated and manually triggered scans.
Enable file monitor for this library
When this is selected, Unmanic will start a file monitoring task against this library path.
File monitoring is generally an alternative to library scanning—you typically only need to enable one method or the other, not both. See Event Monitoring for details on when to use file monitoring and important considerations.
Plugins
The library will do nothing on its own. In order to create any tasks for the files in a library, that library must first be configured with one or more plugins.

To add a new plugin, click the  button.
Select a plugin from the list provided.
If the plugin you require is not yet installed, click the INSTALL PLUGIN button.
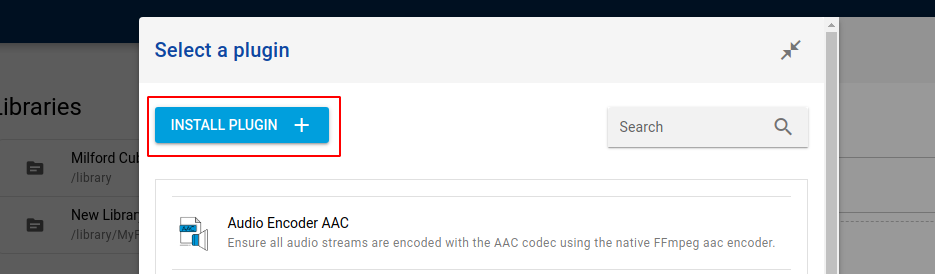
For more information, follow the instructions on installing plugins.
Plugin Flow
Once you have one or more plugins added to a library, you will be able to configure their execution order within each processing stage.
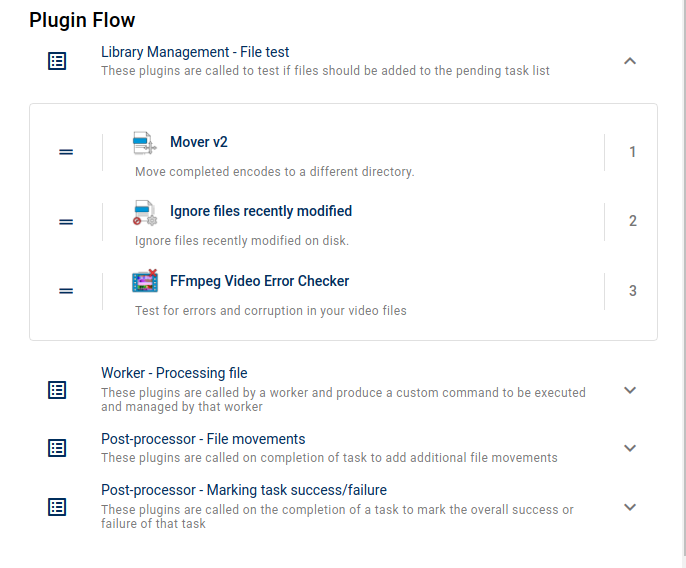
Use the  handle
to drag the plugins into the order that you need them to be executed.
handle
to drag the plugins into the order that you need them to be executed.
Processing Stages
Plugins are organized into four processing stages, each with its own flow that you can reorder:
| Stage | Purpose | When It Runs |
|---|---|---|
| Library Management - File Test | Determine if a file should be added to the pending task queue | During library scans |
| Worker - Process | Transform the file (transcode, convert, modify) | When a worker picks up the task |
| Post-processor - File Movement | Control how the output file is moved or copied | After worker processing completes |
| Post-processor - Task Results | React to the final success or failure of a task | After file movement |
Why Order Matters
Within each stage, plugins execute in the order shown in the flow list. The order can significantly affect results:
File Test Stage
- Plugins run top to bottom until one marks the file for processing
- As soon as any plugin marks a file to be added to the queue, subsequent file test plugins do not run and the file is placed on the task queue immediately
- Place broader filters (like file type checks) before specific ones (like codec checks)
Worker Process Stage
- Each plugin transforms the file in sequence
- Output from one plugin becomes input to the next
- Example: A plugin that extracts subtitles should run before a plugin that transcodes video
Post-processor Stages
- File movement plugins can override default copy/move behavior
- Task result plugins can send notifications or trigger external actions
- Order determines which plugin gets the final say on file placement
Example Flow Configuration
For a video transcoding workflow:
-
File Test Flow:
Ignore files over 50GB(skip very large files)Limit by codec(only process H.264 files)Ignore if already HEVC(skip files already in target format)
-
Worker Process Flow:
Extract subtitles to SRT(preserve subtitles before transcode)Video Transcoder(convert to HEVC)Audio Transcoder(normalize audio)
-
Post-processor File Movement Flow:
Modify file movements(customize output location)
-
Post-processor Task Results Flow:
Notify Plex(refresh library on success)Discord webhook(send completion notification)
Review the plugin flow order after adding plugins to ensure they execute in the correct sequence.
Tags
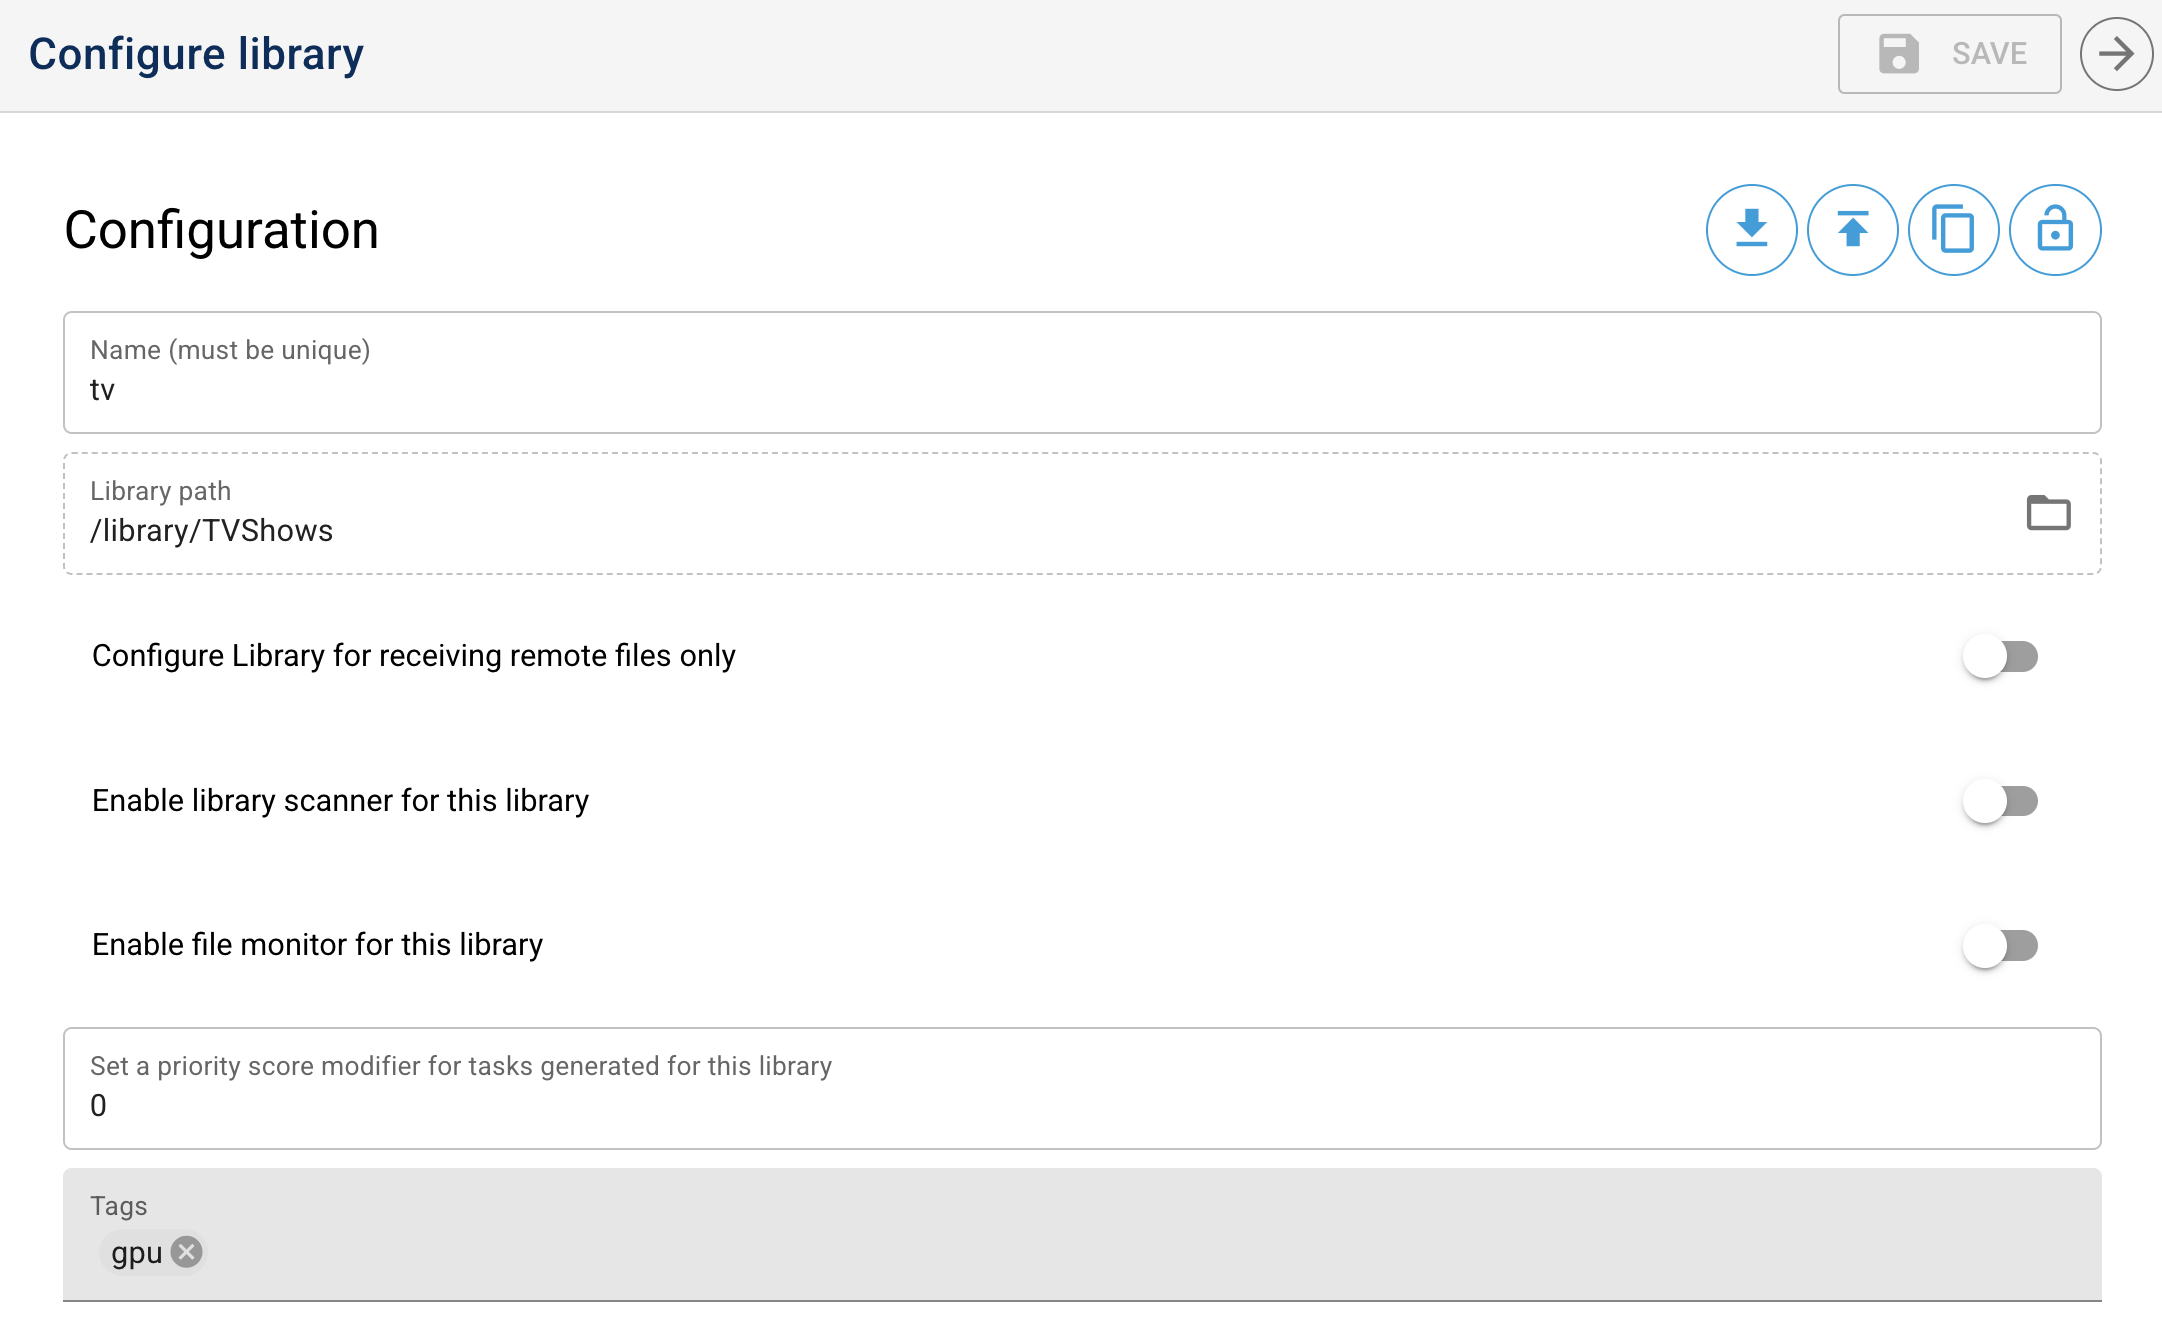
Tags allow you to control which worker groups process tasks from this library. Add one or more tags to a library to route its tasks to worker groups with matching tags.
How tag matching works:
- Tasks from a library are only picked up by worker groups that share at least one common tag
- If a library has no tags, only worker groups with no tags will process its tasks
This feature enables sophisticated processing workflows:
| Library Tags | Worker Group Tags | Result |
|---|---|---|
gpu | gpu | Workers process these tasks |
gpu, 4k | gpu | Workers process these tasks (one tag matches) |
movies | gpu | Workers will NOT process these tasks |
| (none) | (none) | Workers process these tasks |
gpu | (none) | Workers will NOT process these tasks |
Use tags to separate workloads by:
- Hardware requirements:
gpu,cpu-only,high-memory - Media type:
movies,tv,music - Priority:
high-priority,background - Quality tier:
4k,1080p,archive
For more information on configuring worker groups and their tags, see Worker Settings.